In fact, I was very excited and happy at the beginning of this unit. Because Pual has no limitations on the content of the animation, except for a few rules to be aware of, it’s a free-for-all. I’ve wanted to make my own animation since I came to this programme, and this was a great opportunity to do so. But at the same time, because it is a collaborative project, I can’t do exactly what I want to do, and I think it’s a good challenge to learn how to communicate ideas and assign tasks, which is a skill that I lack. By the way, I really want to work for ILM.
My mission
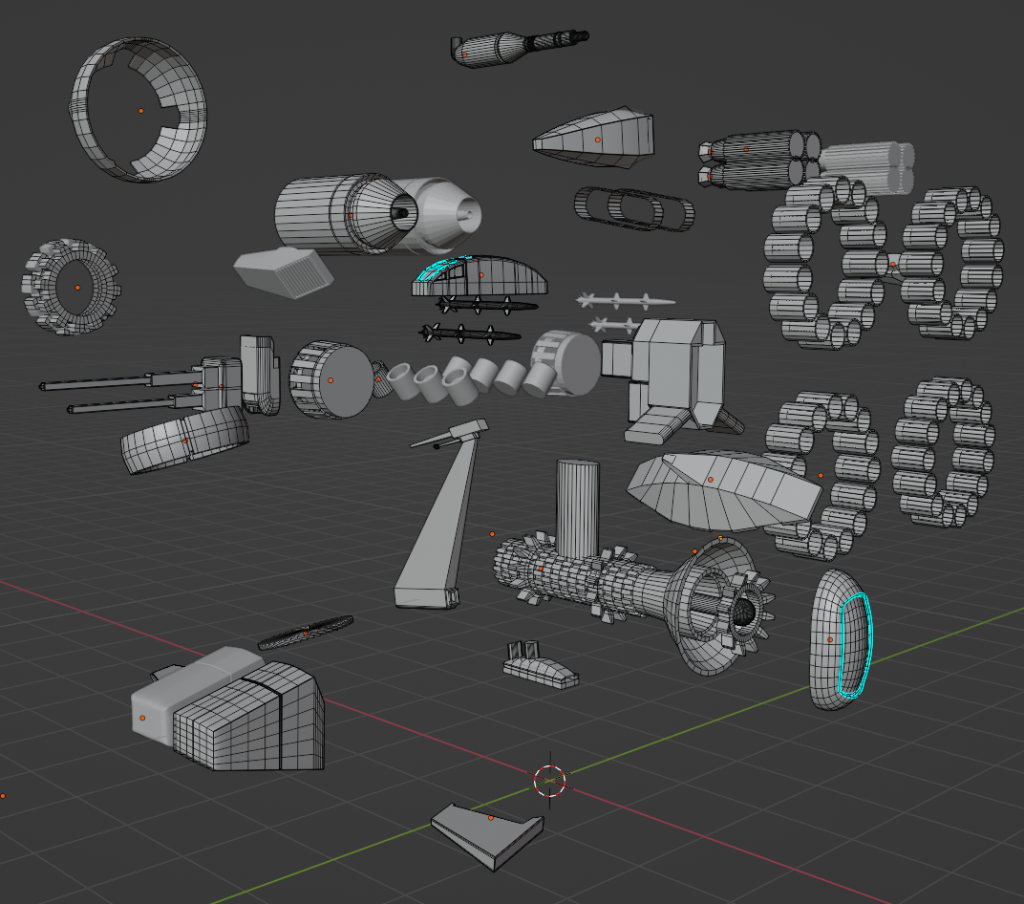
I was responsible for 80% of the 3D modelling and production of the animation throughout the project. Including wormholes, cosmic environments, the main character’s spaceship and the abandoned spaceships on the planet, a total of 6, two characters and their skeleton bindings, two deformations of the restaurant at the end of the animation and two deformations of the planet’s form, and finally the creation of the terrain environments.
Origin of Animation Scripts
There were five of us in the group in total, all very individual, and at the beginning of the first week we each started by elaborating on our story lines, and as Becca wasn’t involved in the first week we only referred to the four of us and all found different problems. I won’t go into that here as it’s rather complicated. Truth be told we all chose to blend our individual ideas to avoid arguments. (I’m more of a sci-fi film fan so you can see that there are rather gorgeous images at the beginning and end of the shot.)
Why am I only responsible for the 3D animation part?
For the group as a whole, everyone was very good at designing and drawing, so to avoid arguments and to be fair, I gave up designing. For myself, I thought I had enough practice in design from the previous units, so I wanted to try my hand at an area I wouldn’t have mastered yet, namely 3D animation.
References of my idea & How I solve technical problems
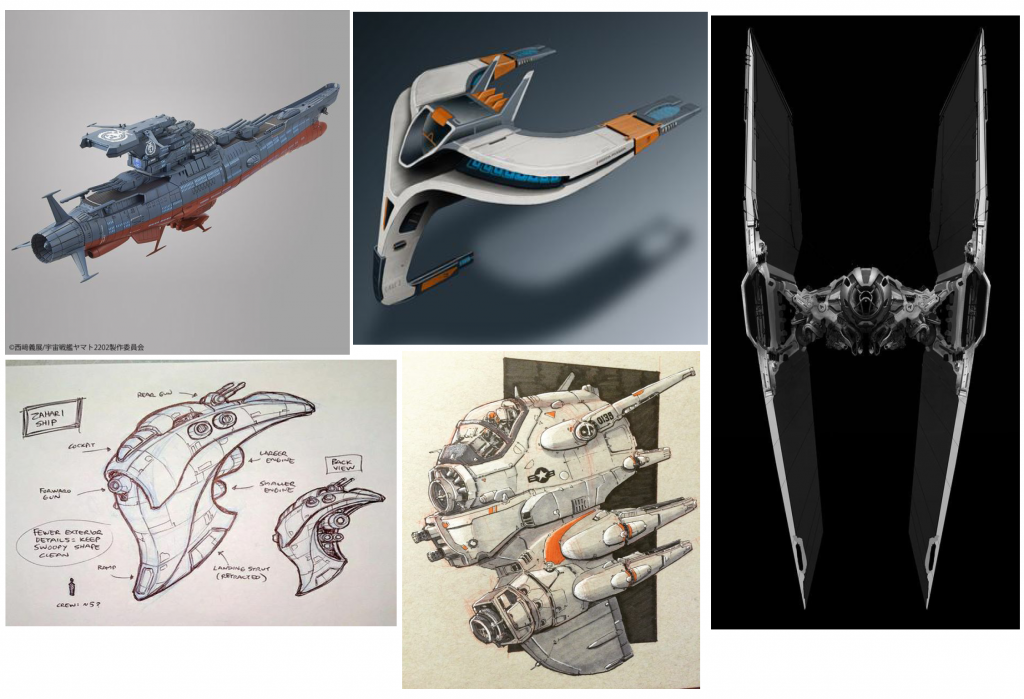
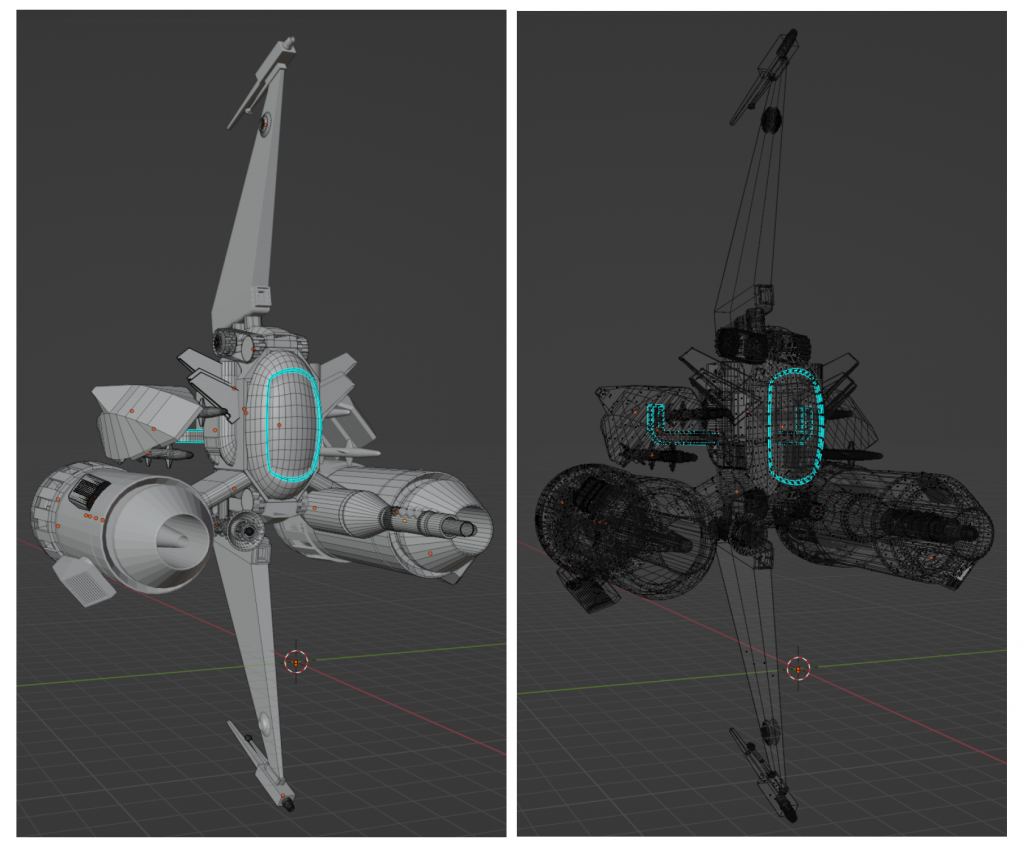
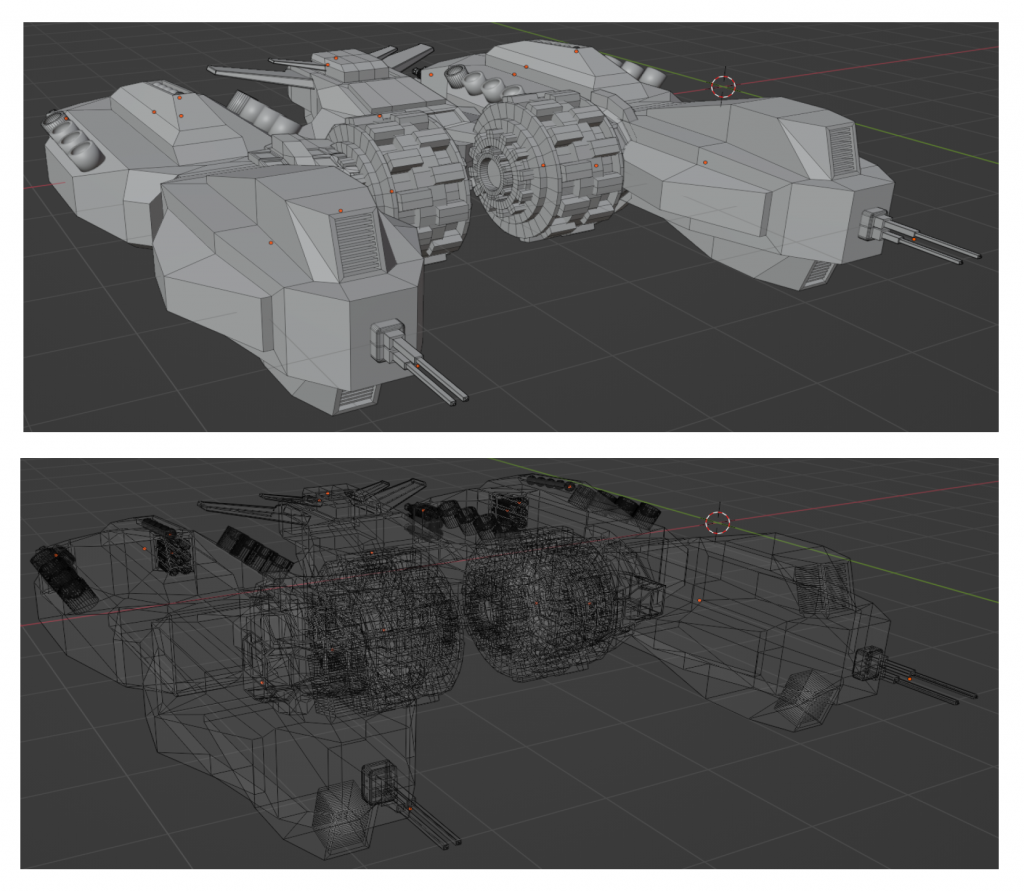
1.Main Spaceship-references
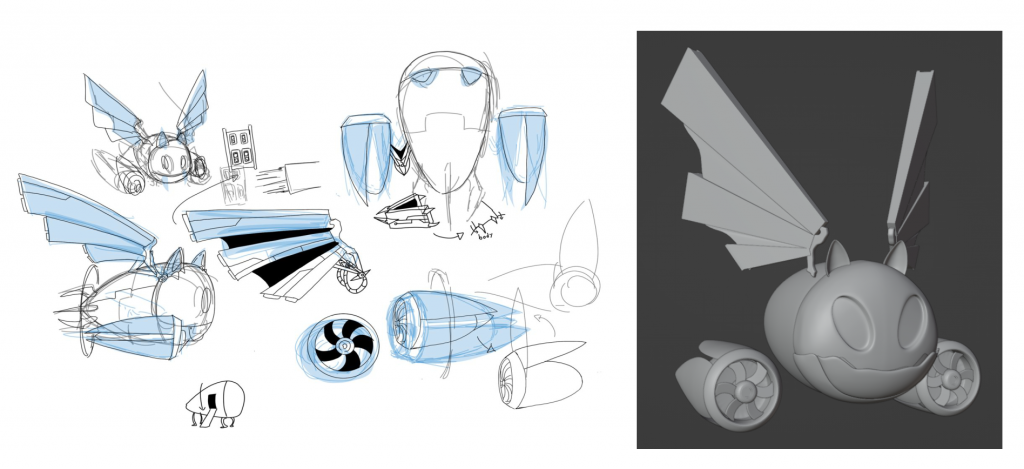
(*Designed by Edda)
After I saw her first ship design I saw a lot of things that didn’t make sense in the 3D view of this ship. For example, the wings that unfold and the four blades of the turbine engines that get opened, and all these details in the articulation. These distortions and displays are not visible to the viewer in the camera and lead to more complex modelling, in short there are problems everywhere.
Because the character design references insects, the spaceship also needs to consider biotechnology. I gathered a lot of designs on Pinterest that I thought were effectively minimalist for her to reference, and in the end we both agreed on the expression.
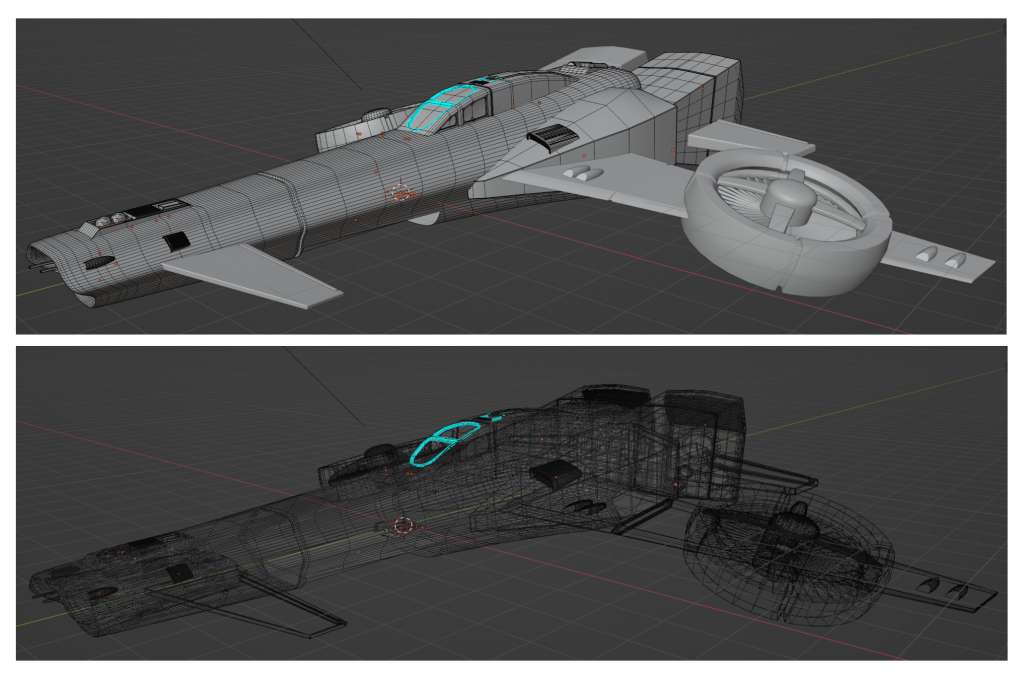
Main Spaceship-How I solve technical problems
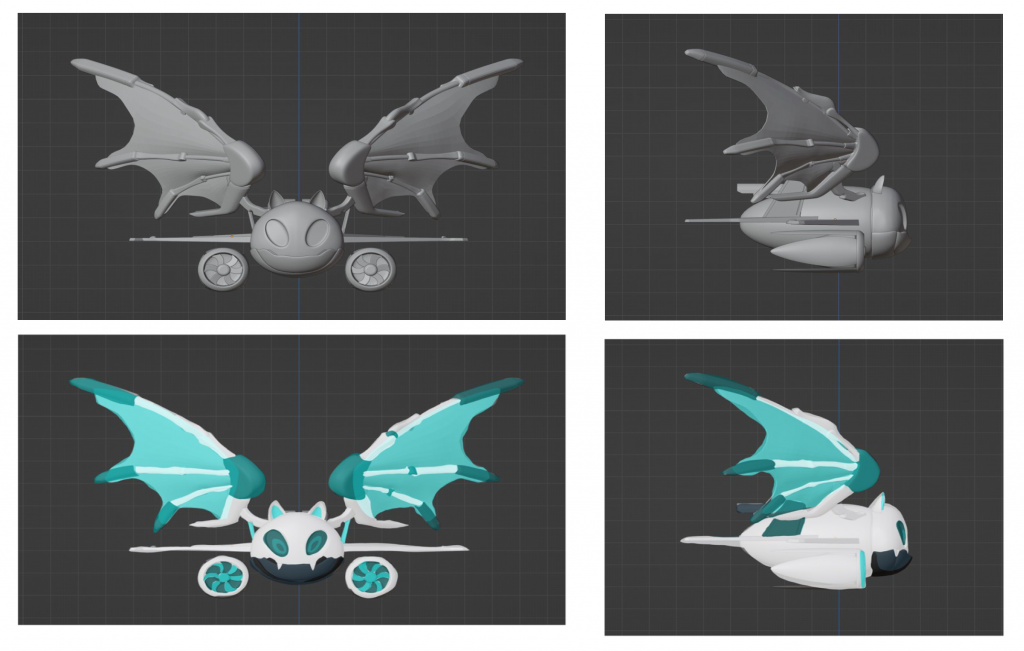
In all honesty, I spent a lot of time on this wing, starting with modelling the parts of the skeleton, to the middle sheath wing, which I pulled out from a flat surface little by little in point mode for the perfect curved arc.
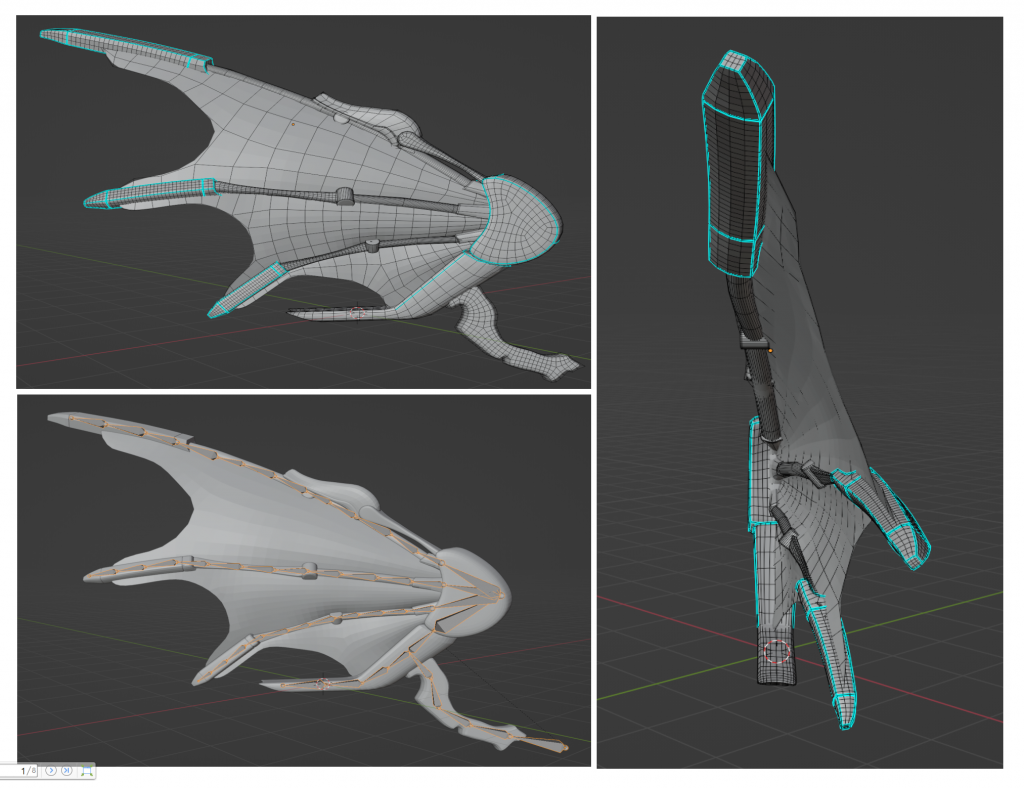
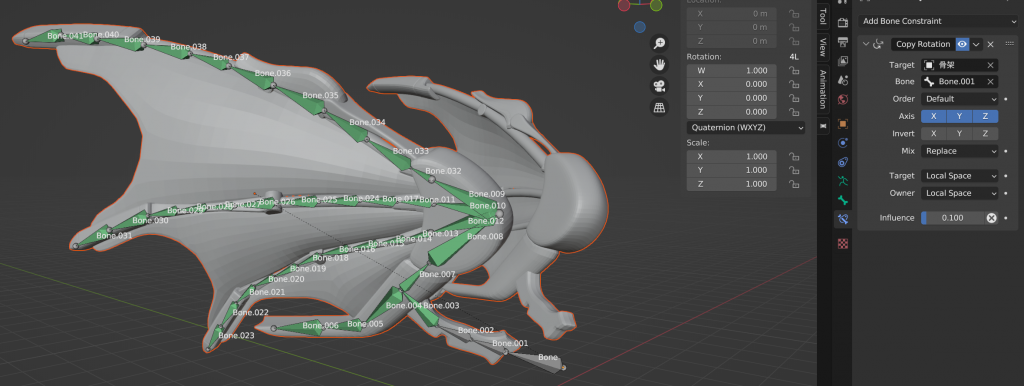
For the movement of the sheathed wings I mainly had Bone.002 move back and forth for a looped frame first, and then all the bones after that were set to copy the rotation modifier, which copied the rotation of Bone.002 and then there was this fluttering of the wings effect.
Main Spaceship-How it works in animation?
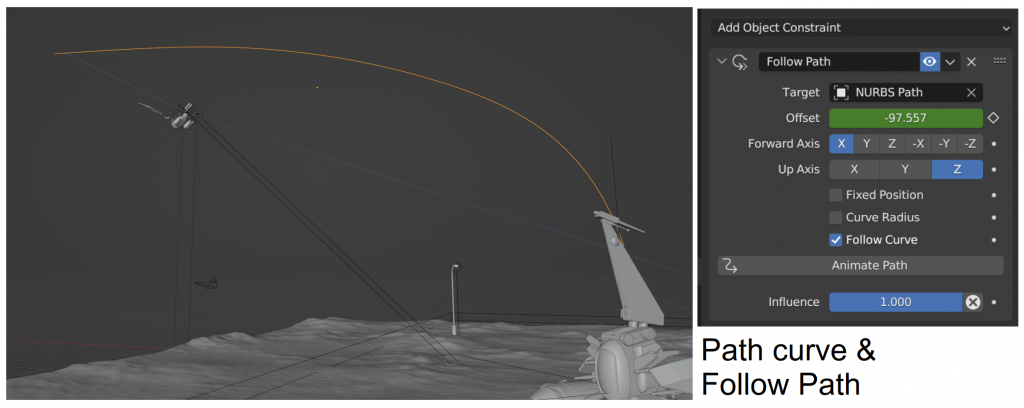
In the animation I mostly used path curves to set up the flight and landing routes of the ship.
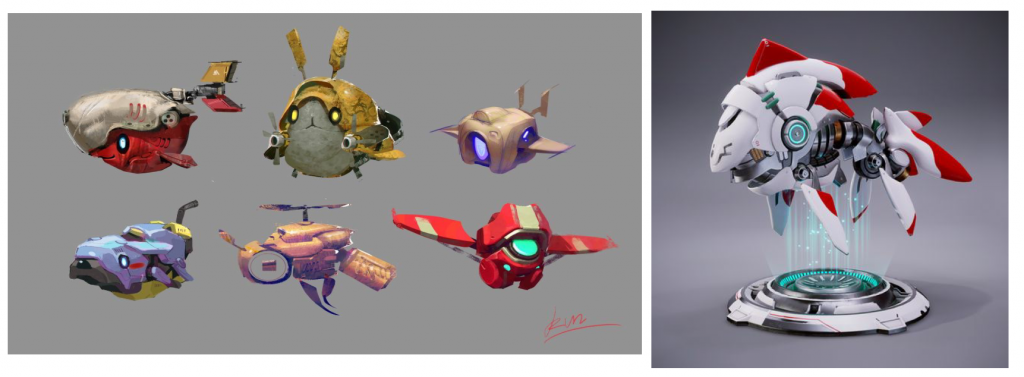
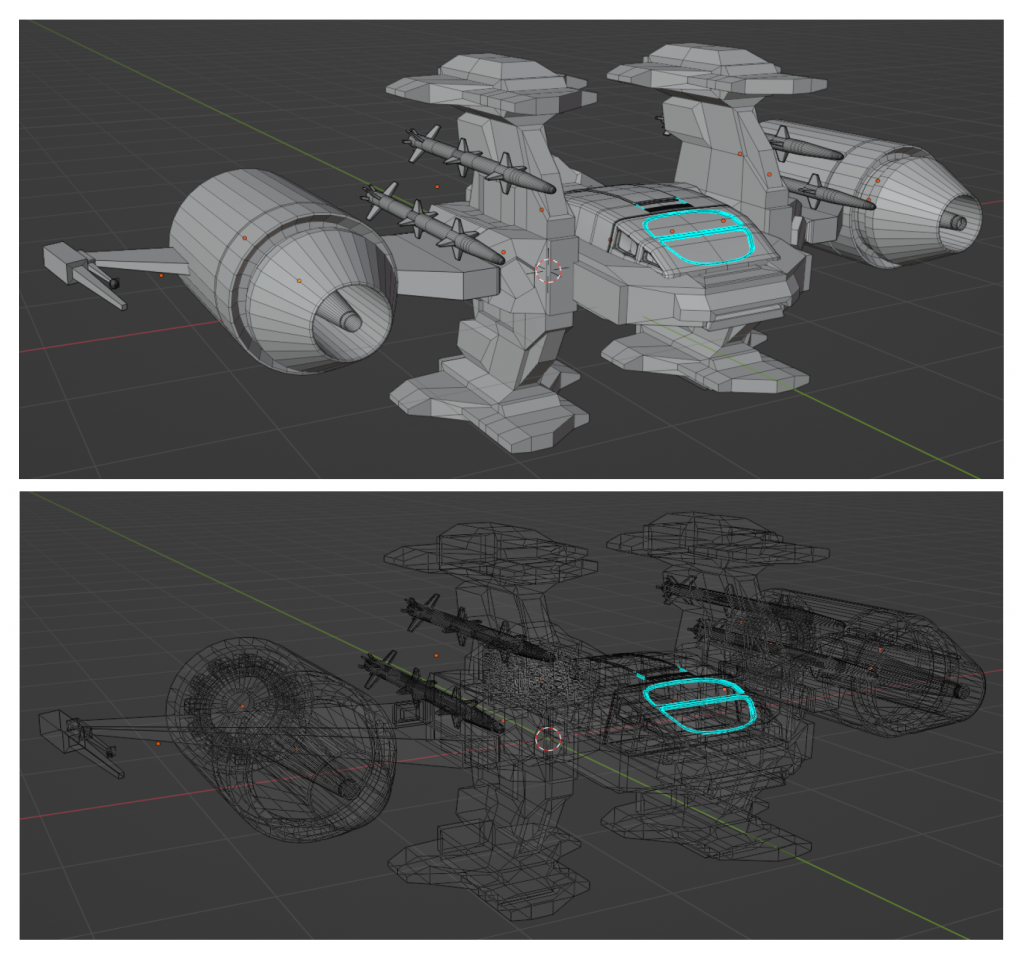
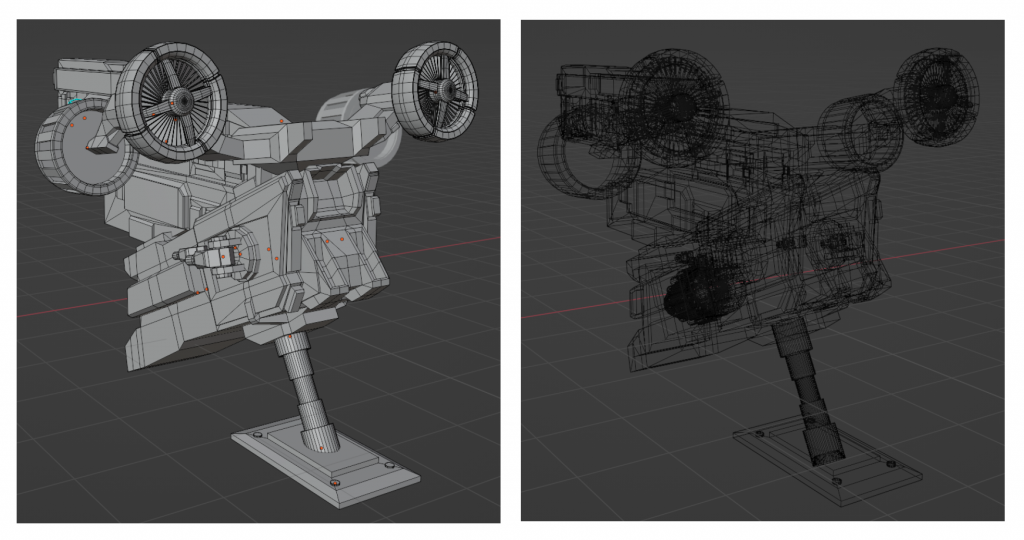
2.The rest of the spaceship styling design-references
Since spaceships are varied, as gleaned through Pinterest, I’m going to model the effect I want directly in Blender, which should be sharp, sci-fi, and a fighter jet of sorts.
The rest of the spaceship-process
For the sake of efficiency, all three of these latter ships use parts localised to the previous two ships to reduce the workload, and do the rest of the work directly on the geometry using Extrude Region and Inset Faces.
3. Two characters-How I solve technical problems
The modelling of the characters wasn’t complicated but it was also very time consuming, the hardest part to work out I think was their scarves, I learnt how to use the Shrinkwrap modifier but it still took time to get the scarves to fit on the body like I did the sheath fins for the airship wings earlier in the day.
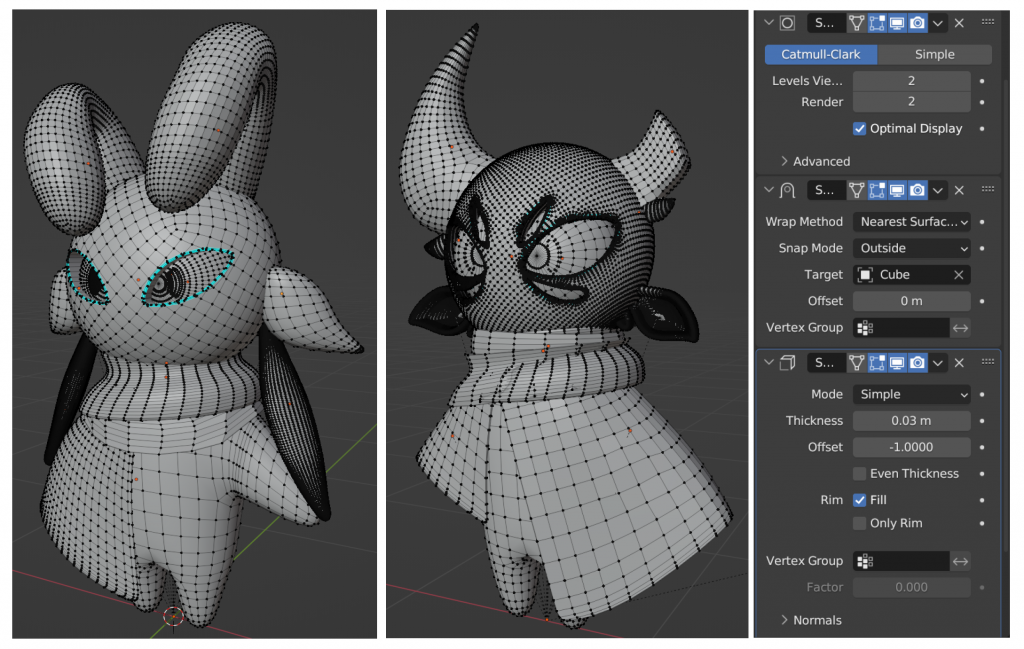
For the character binding I followed a Youtube tutorial and used Blender’s own plugin Rigfy to make it, but of course the results were rather poor and I ended up needing the help of tutor Molly to fix it.
4. Cosmic wormhole styling design-references
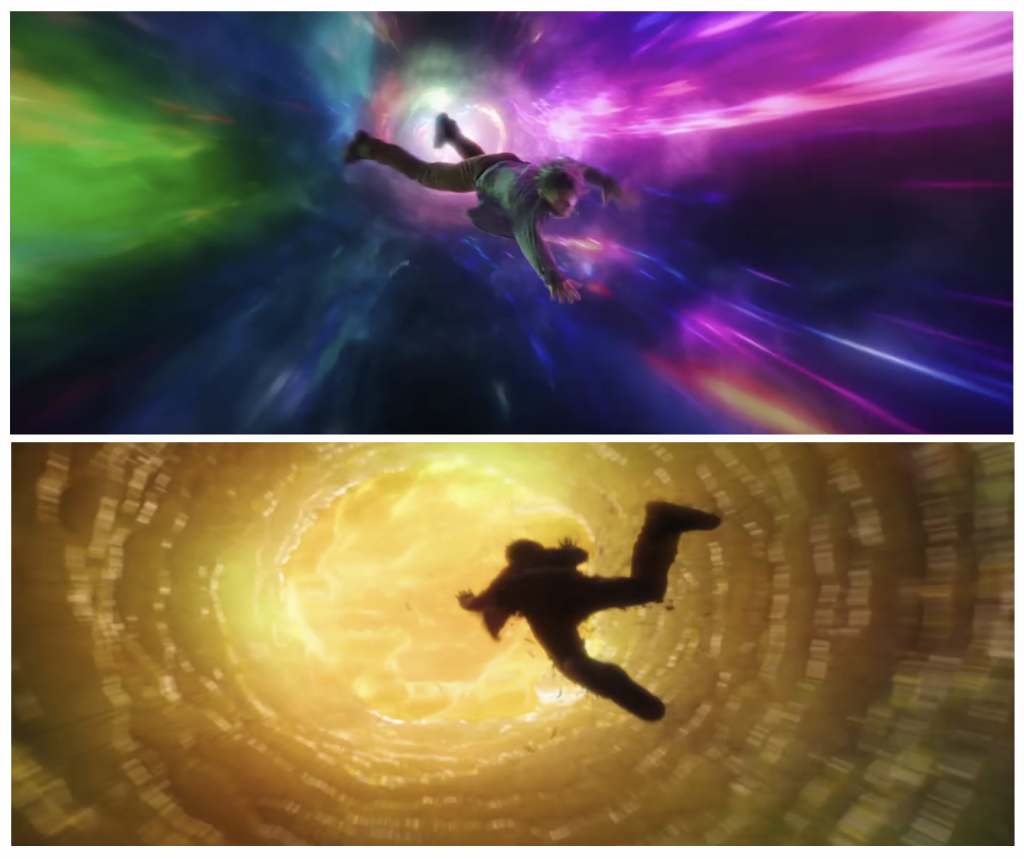
Speaking of wormholes, what struck me the most was the first Doctor Strange film being sent into the multiverse by the Ancient One Mage.
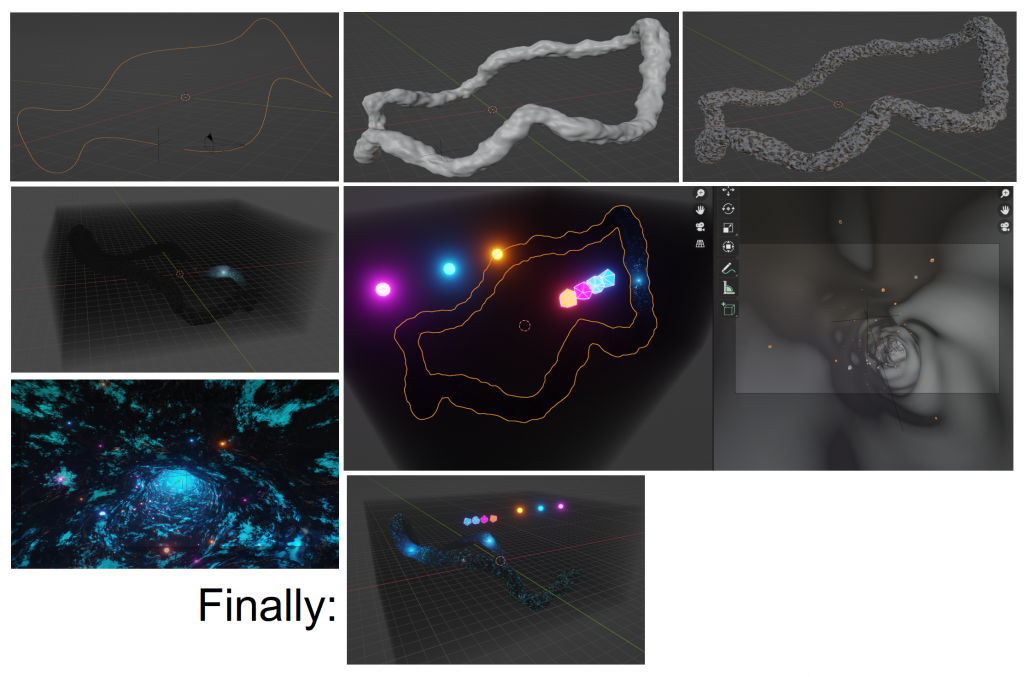
Cosmic wormhole-How I solve technical problems
Again, I accomplished this effect by teaching myself on Youtube. First, I created a Bezier curve and move up and down the position of the point to form an irregular loop. Second, I used the Displace modifier to transform the Bezier curve into a cloud texture. Third, add the camera and using Follow Path modifier, and add lights on the path to follow the camera to move, and then add a rectangle of volumetric fog. Finally add a few glowing spheres set to fixed particles appearing in the inner wall of the wormhole as a planet, through the debugging basically complete.
5.Cosmic Environment – Meteorites-How I solve technical problems
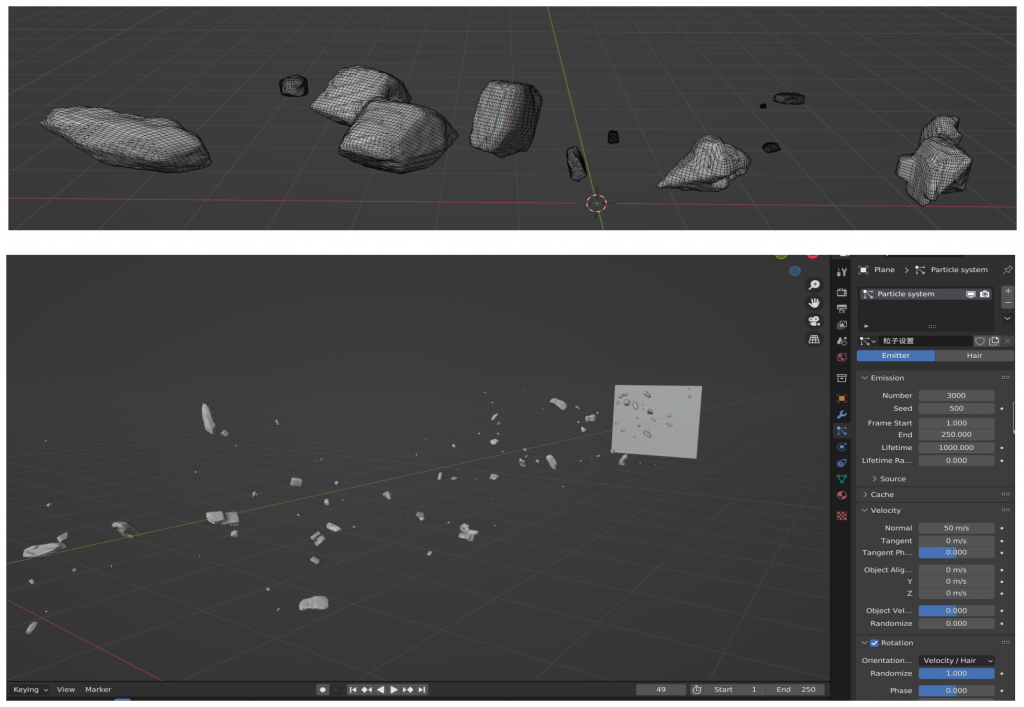
Firstly I started by making the most basic shapes of different types of meteorites by extruding and subdividing them locally so that they appear randomly in the universe. Then, by setting the particle emission to the plane, the emission is set to a collection of the above particles and set the random size value and the total number. Finally, the universe was created by emitting the meteorites with the play button and pausing the screen to delete the original plane.
6.Terrain styling design -references
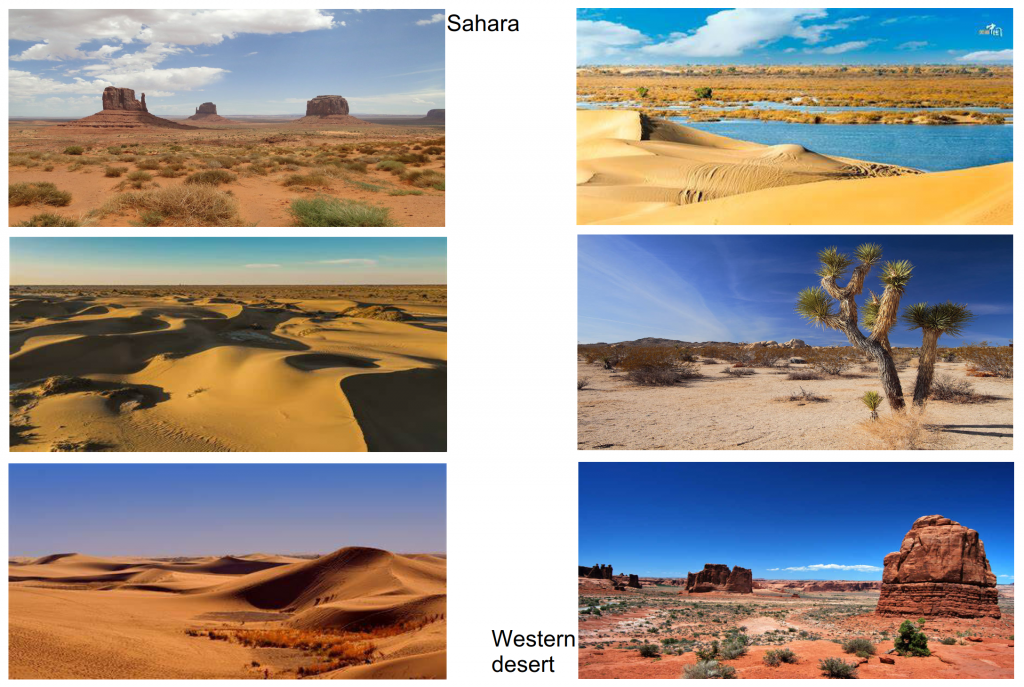
In order to express the feeling of the planet being desolate and lifeless, the desert has become a unanimous choice for everyone, but there have been disagreements on whether to use the Sahara Desert as the prototype or the desert in the western United States as the prototype. Some people believe that if they want to carry out that feeling of desolation, they should use the Sahara Desert, while others believe that being all sand too boring. Cacti growing in the western desert can just alleviate this boredom.
Terrain-How I solve technical problems

I made it using the A.N.T. Landscape plugin that comes with Blender.
7.Dining room styling design-references
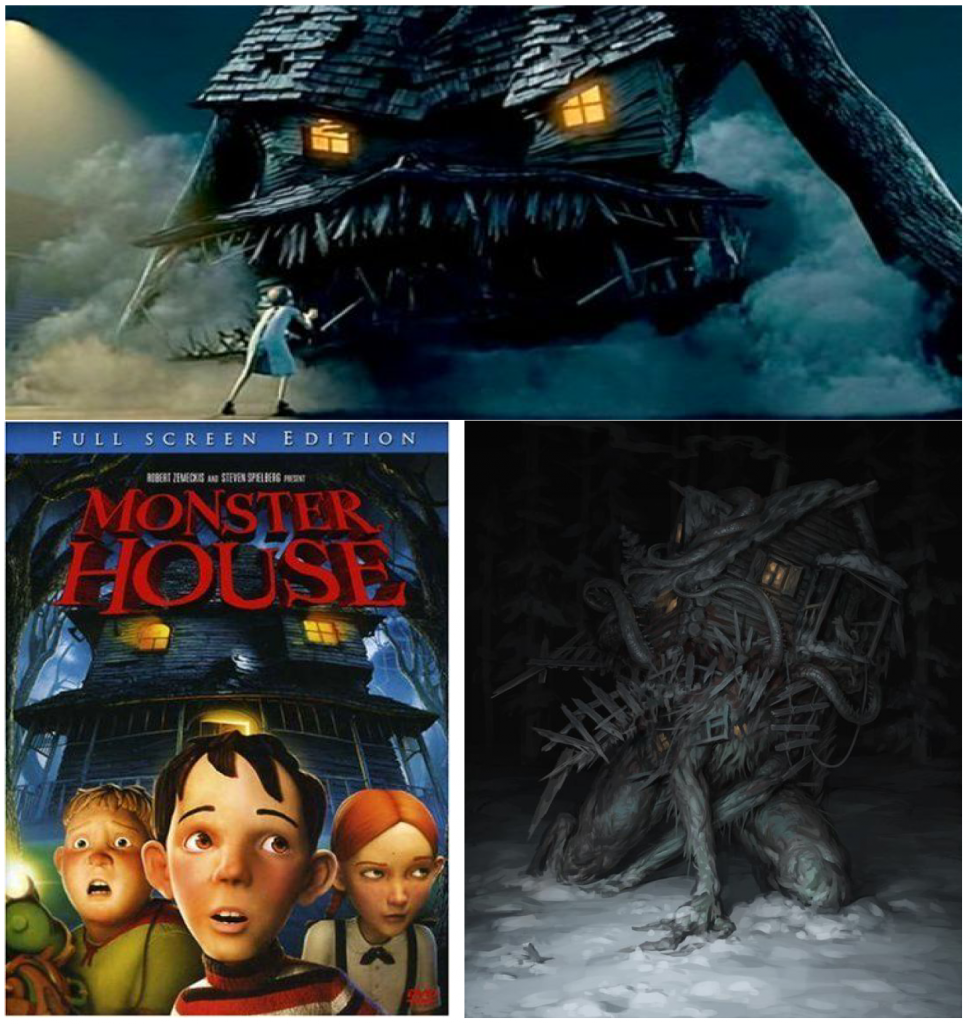
In fact, the idea of the house eating people was brought up by me, I remember very well an animated film I watched before called Monster House, which is very similar to our story, where the house looks like it’s alive and attracts visitors to enter the interior out of curiosity then kills everyone. As a reference for my image, I found that I not only had a hard time using the bone binding as flexibly as it was shown in the animation, but also that it was easy to make mistakes in Blender.
I was inspired by Susie’s suggestion to name our animation Flytrap during a chance encounter. I don’t need to make it so complicated, instead, I just need to express the meaning with the change of movement like a flytrap.
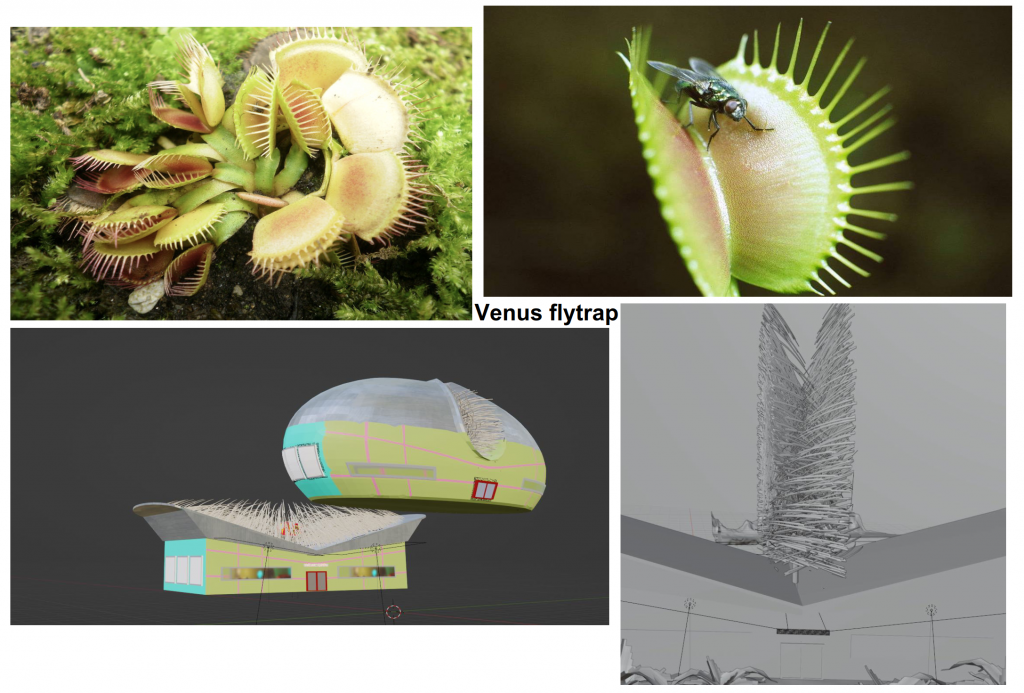
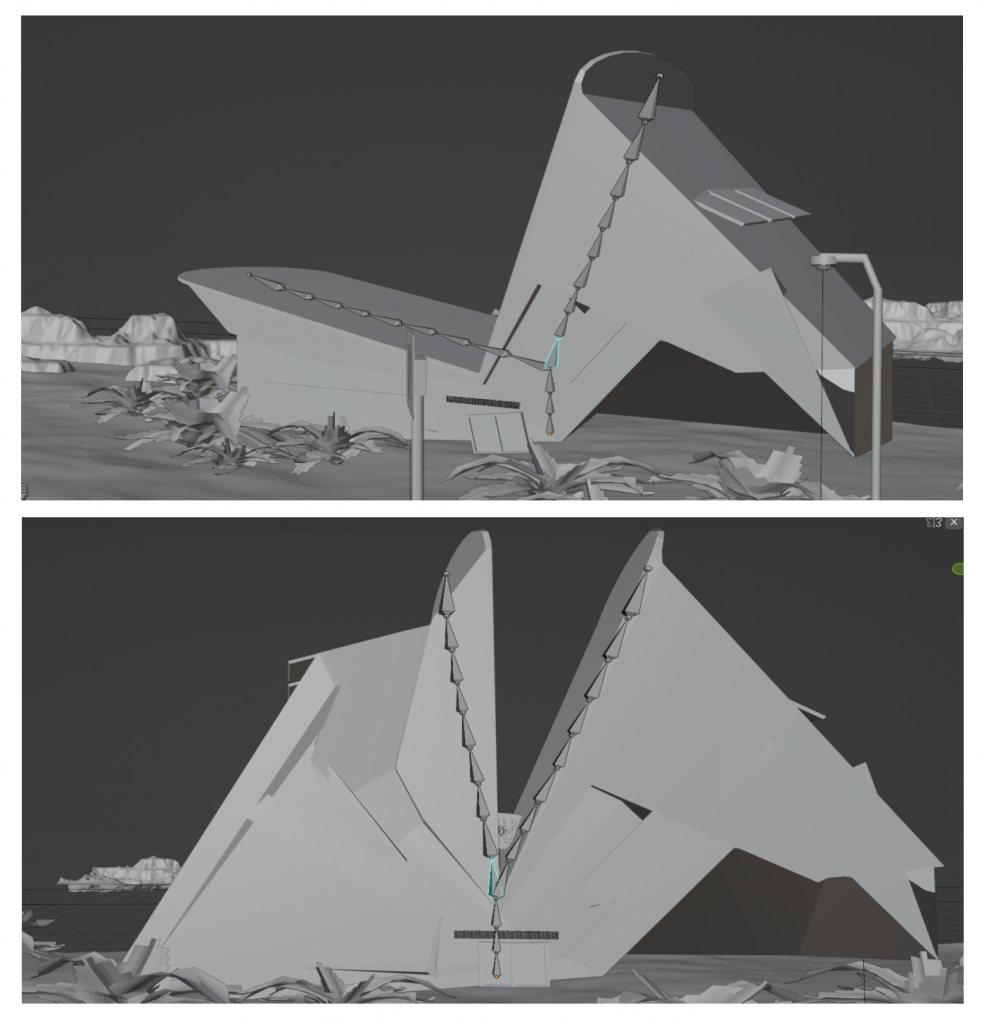
Monster’s teeth on the dining room-How I solve technical problems
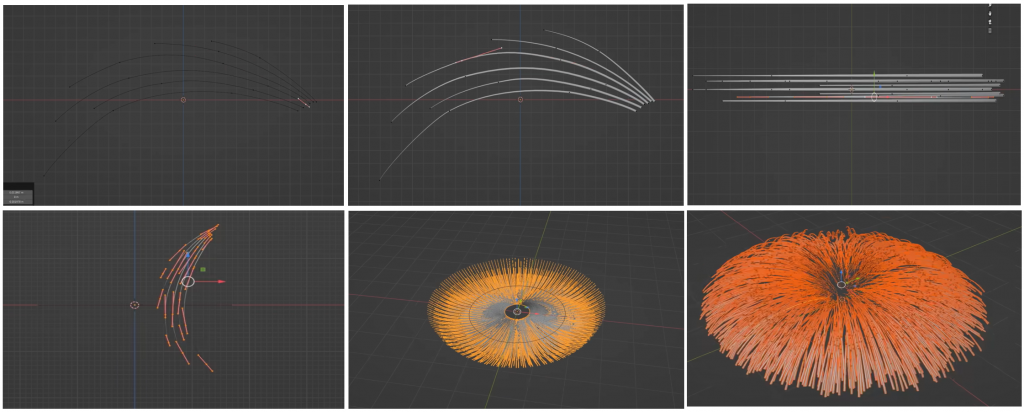
First, I started by hand-drawing the curves of the tooth bends with a grease pencil inside Blender’s edit mode. Second, the Data property in Object mode adds thickness to the curve. Third, use copy and paste to achieve the misalignment effect. Fourth, add array and curve modifiers to rotate it around the Bezier curve to achieve the effect of the teeth around the mouth. Finally, choose Object > Random Transform in Object mode.
Dining room-How it works in animation?
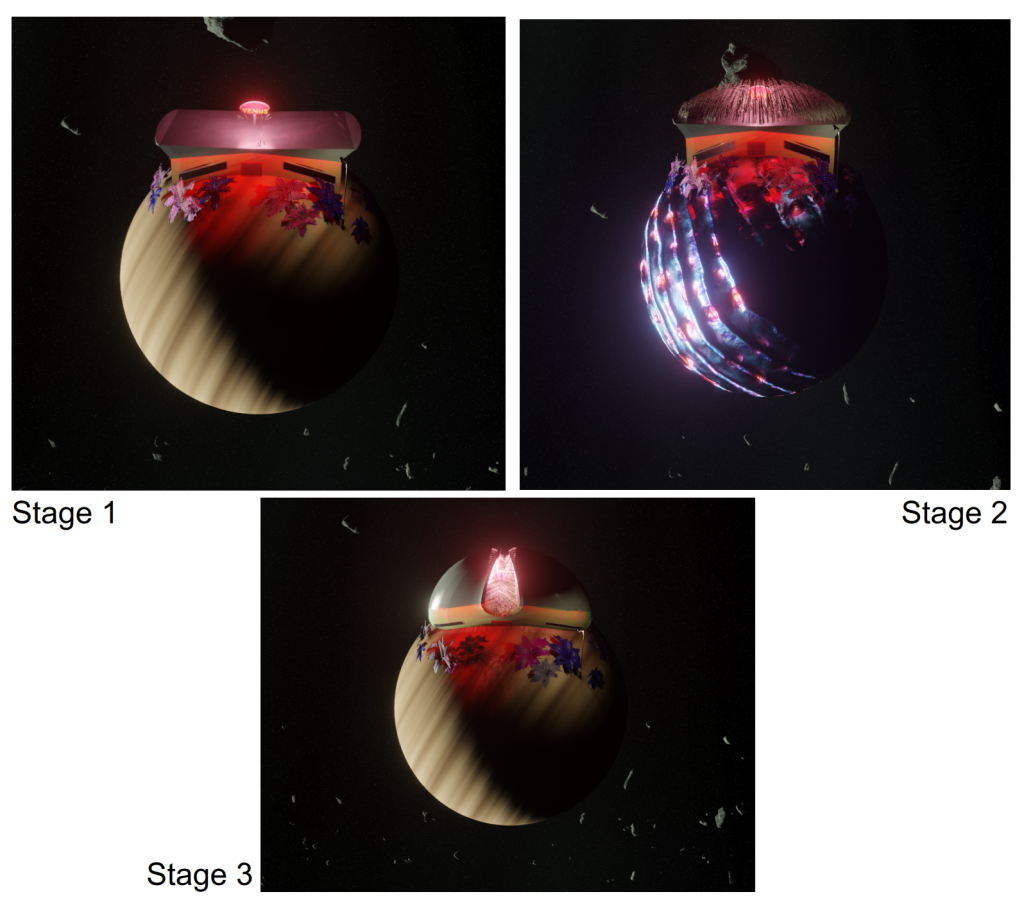
I mentioned earlier that because of technical difficulties I had to avoid this problem by blindfolding-(relying on meteorites to obscure the camera) as a way of revealing the secrets of this restaurant and planet.
Group dynamic (Individual)
The main problem with this collaboration was the lack of communication between the team members, which resulted in us not being able to follow up with our team members in real time, resulting in our animation not being completed in the last week. Of course, as you can see, I have to be honest, I did and overcame 80% of the workload of the whole project, so I was disappointed with the attitude and efficiency of the others. In addition to that, the characters were also lacking in expression, with a lack of vivid movement and expression changes, I think we need more time to work on this project and improve it if possible.