Link to 3D works(animation and blender file) :https://artslondon-my.sharepoint.com/:f:/r/personal/h_lin0320231_arts_ac_uk/Documents/Hao_Lin_23025265_Unit_8_Document_of_works?csf=1&web=1&e=rDqRkv
This unit takes animals as its theme and lasts for two months. It is divided into two parts: 2D future animal character design and 3D animal modeling and animation production.
What did I learned
For 3D modelling and animation, it was a new test for me as most of my previous projects were about analysing and modelling buildings and scenes. During this period, I spent a lot of time collecting wolf data from various websites including pictures and videos, but eventually, I learnt how to use close-up pictures from different angles to analyse from muscle to bone to hair to create a real 3D wolf and express it with animation according to the wolf’s character in blender.
For the future 2D animal character design, although I have already had training in character design and other related projects, due to my personal style, which is more mechanistic and sci-fi, I have not drawn much to understand the animal’s physical structure. However, through my studies in 3D and the constant collection of wolf conceptual designs, I eventually understood the wolf’s physical form and the possibility of its body structure mutating after evolution due to environmental changes.
In this blog, I’m going to cover the entire process of making my 2D and 3D work in chronological order.
3D: Why did I choose the Wolf and how did it start?
In the beginning, I didn’t realise how hard it would be to follow up making a wolf, I just subconsciously liked the idea of trying to make an animal that just looked cool, and out of the list of animals only the wolf I was more in tune with my personality, that’s the only reason. As for the species, I eventually chose the Eurasian wolf.
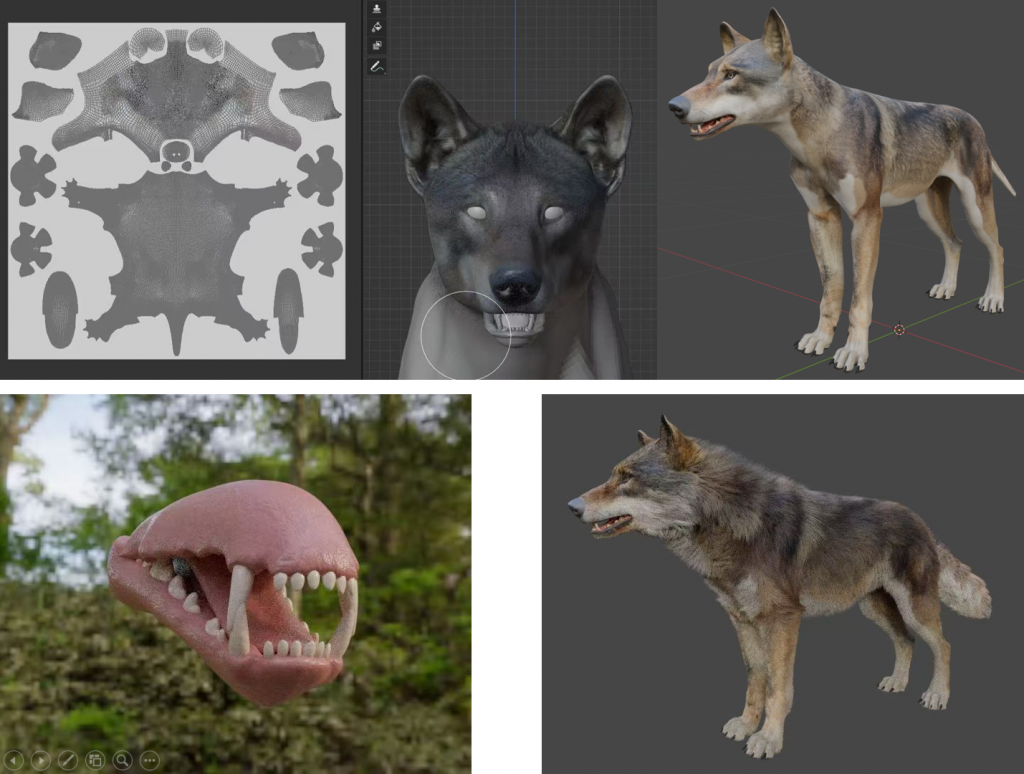
In the first week, we need to finish the shape of the animal with carving, so we need to determine the type of animal of choice, length, width and other information data. Secondly, we need to find a lot of pictures of the front side top view and so on of the same kind of pictures to determine the details. And Molly also provided (https://www.vfxgrace.com/3D) a website of animal models made by professional artists for reference, which provided me with great convenience, because the wolf itself is covered with a lot of hair, and it’s hard to understand the direction of the wolf’s muscular structure just by looking at the pictures.
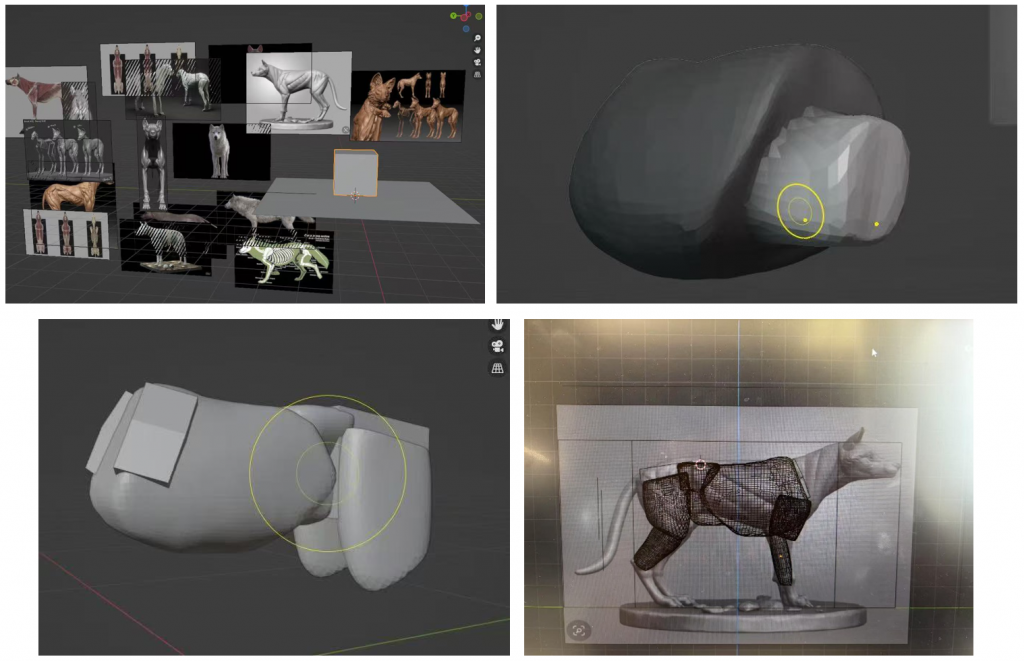
Starting from the cube, then through 4-level surface subdivision, use the brush tool in sculpt mode to determine the main body structure proportions of several wolves. Then combine each part together and gradually carve the model details by reconstructing the mesh (with voxel sizes ranging from 0.1 to 0.01 to 0.002).
It took me two weeks to become proficient in using the sculpting tools. Moreover, since the specific structures of each part in the reference materials were different, this uncertainty brought me a lot of trouble. Therefore, I needed to constantly compare and refer to them to take the median value. Overall, this is a very painful and long process.
Retopology
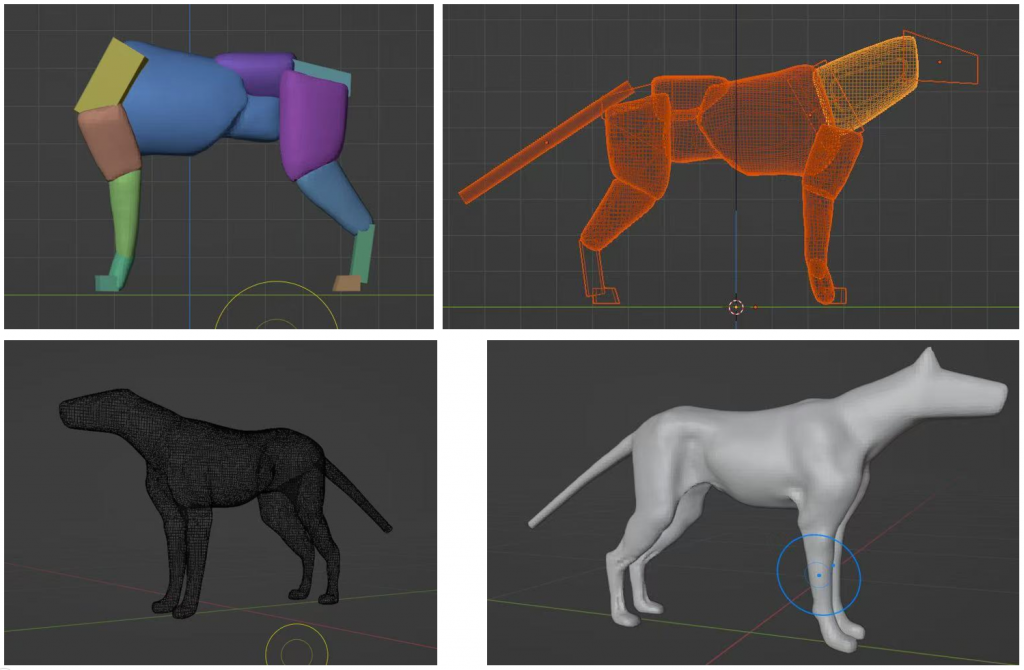
In order to ensure the smooth movement of the animals in the final animation without any deformation and to reduce the number of faces, retopology is a very crucial step. Starting from the face, extrude the face from the outside to the inside around the local structure like a edge Loop, using the snap function and the shrink modifier until the entire model is covered.
In the meantime, since I thought it would look really WEIRD if the wolf didn’t open its mouth in the final animated representation, I re-sculpted and retopologised a complete mouth structure from a reference drawing of the inside of the wolf’s mouth.
Retopology – Add the mouth
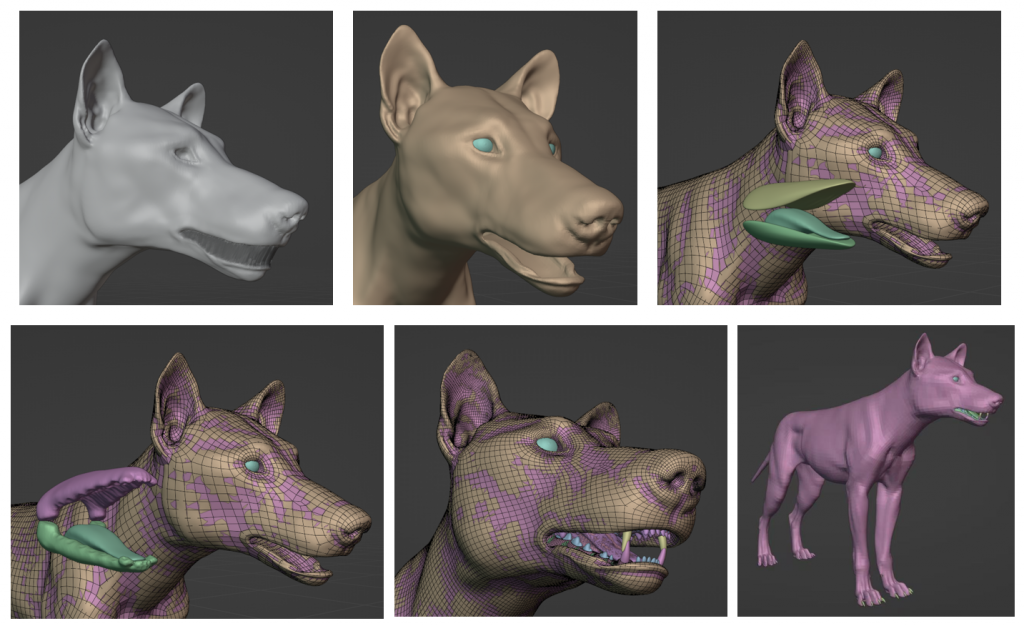
This part of the project took me two weeks to complete, and I had to refer to the wiring principles with the help of other similar animals’ model topologies. I think the hardest part is the articulation between localities, in order to keep the quadrilateral faces, the number of looped edges of each locality needs to be even, if there is a difference in the number of edges, then the articulation will not be possible or will lead to the creation of triangular faces, which is like doing a maths problem to me.
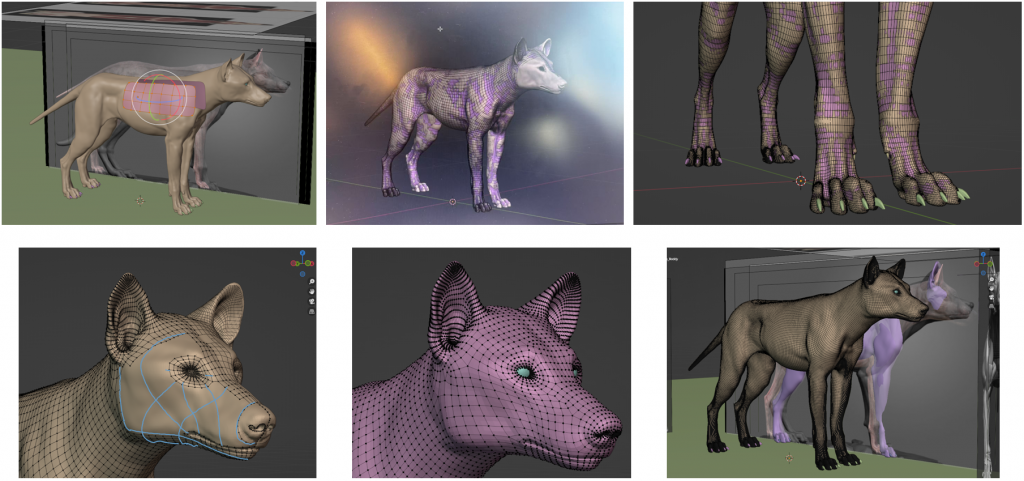
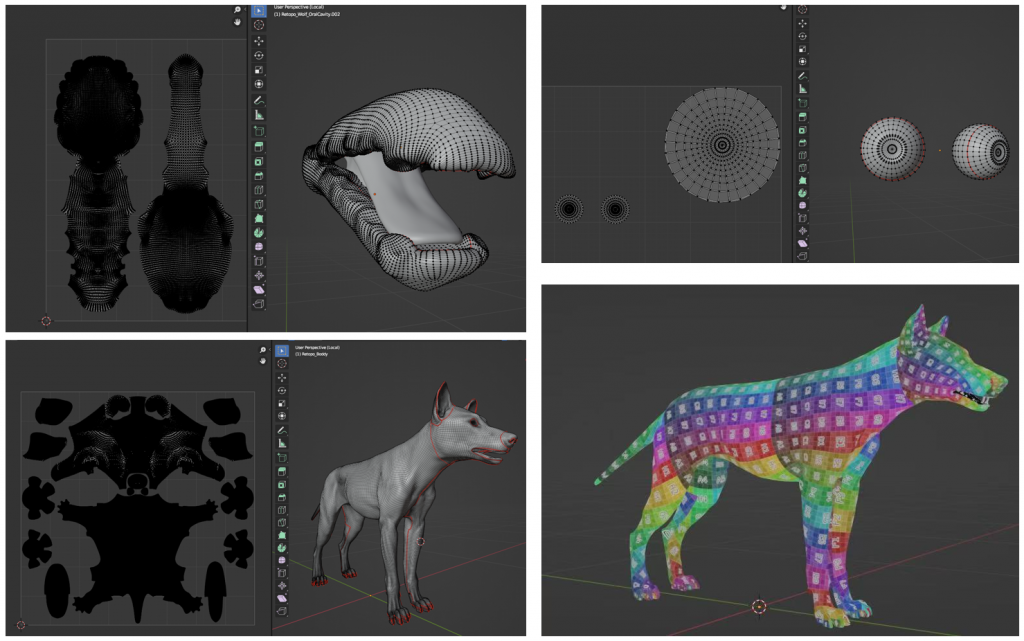
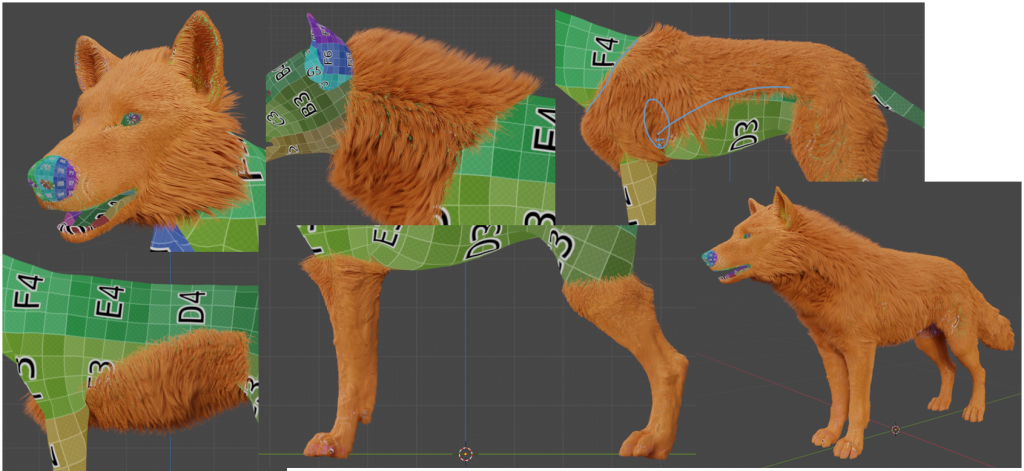
UV unwrap
This step is to unfold the model into a flat surface like an autopsy, in order to facilitate the necessary preparation for the next step of texture painting. The purpose of the checkerboard is to check if the UVs are stretched, if they are, then I need to zoom in or out of the stretched areas in UV Editing to make the checkerboard numbers and colours average in size.
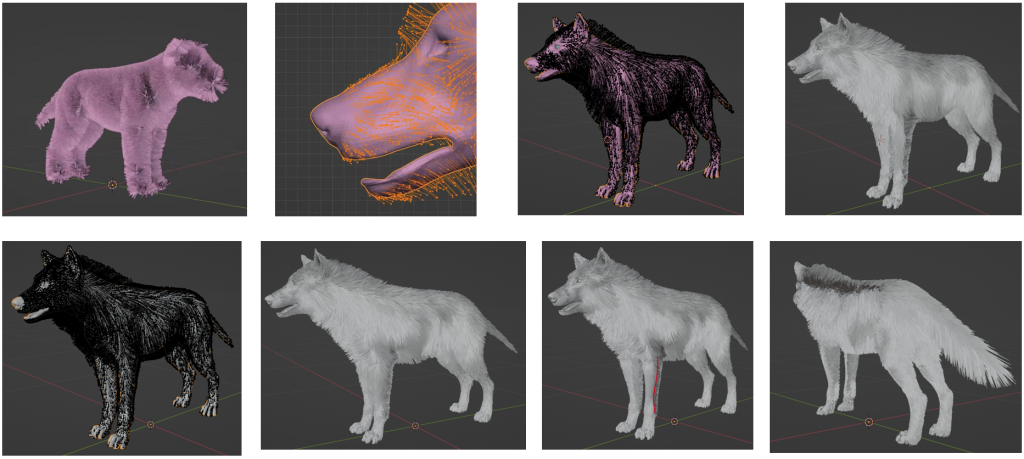
Add the fur
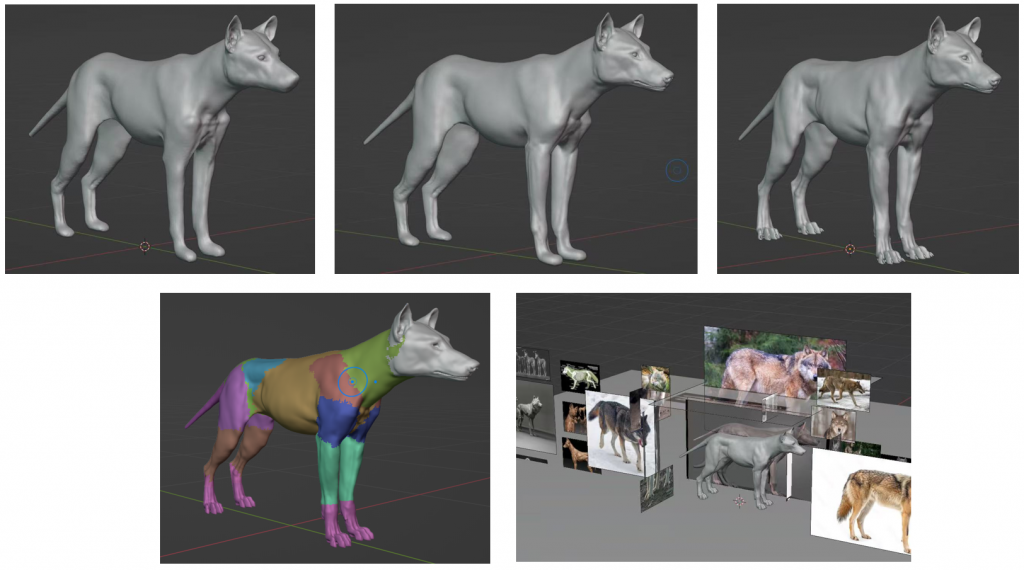
This step is related to the quality of the entire work. Therefore, through a large number of close-up reference pictures of wolves, I spent a full month learning how to set the hair particles and studying the direction, length, and density of Wolf hair in order to restore the most realistic appearance of Wolf hair. I must say that I don’t want to go through it a second time. It’s very time-consuming, laborious and painful for me.
In the first stage, I first combed the overall direction of the Wolf’s fur. In the second stage, the length of the hair in the local area is edited. Finally, reduce the hair editing density through Settings and manual additions.
Add the fur – analysis
1.Head hair
From behind the nose to the front of the side face including the mouth, the hair is mainly short hair, conforming to the facial contour. The hair around the eyes gradually grows longer.
2.Ear hair
The overall orientation of the ear hair is upward. There is a part of the hair on the inner side covering the ear canal, covering approximately half of the inner part of the ear. The overall length remains short and even.
3.Neck and back hair
The hair above the neck and spine is the fluffiest and relatively long area of the whole body. The hair on the inner side of the neck is longer in the middle and shorter on both sides, and there is a distinct convergence direction. The hair on the chest presents a volume that protrudes outward.
4.Body hair
The hair growth direction on the trunk is rather complex. Therefore, I divide it into two areas, the upper and the lower, for combing. The hair on the upper part (near the back) faces diagonally backward. Lower hair (abdomen and sides of the abdomen) : The hair is facing down and shows a distinct tendency to curl in the middle.
5.Leg and tail hair
The hair on the limbs and tail is generally oriented from front to back. The key point is that the density gradually decreases from top to bottom, and there is no hair covering the soles of the feet.
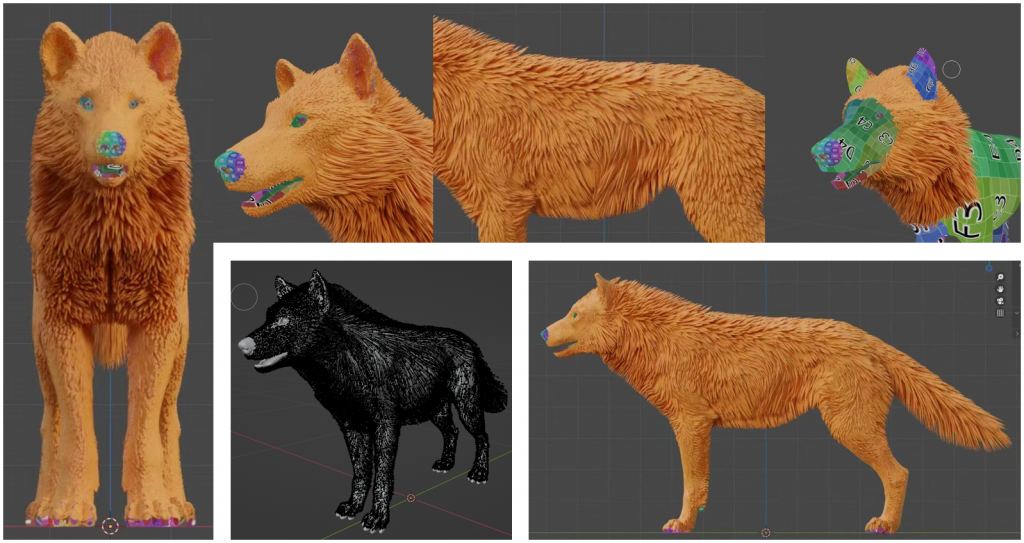
Texture painting
Everything is ready. This step determines the race of the wolf. The picture drawing method taught by Molly is very fast and magical. To achieve higher quality and effect, I specially spent half a day looking for 4K Eurasian Wolf pictures for reference. It took me two days to complete the material of the Wolf. The mouth part was simulated with the texture of meat, and the effect was very good. Finally, I added the hair, and the realistic 3D Wolf was thus born!
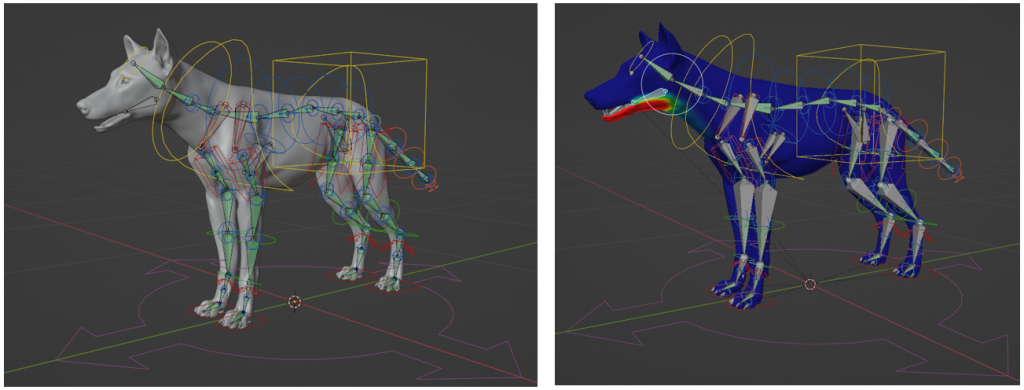
Rigging
This is the simplest step. Just generate the skeleton using the rigify add-one to rig it. Since my Wolf’s mouth needs to be able to open and close, I added a segment of skeleton for control and achieved this by re-brushing the weights.
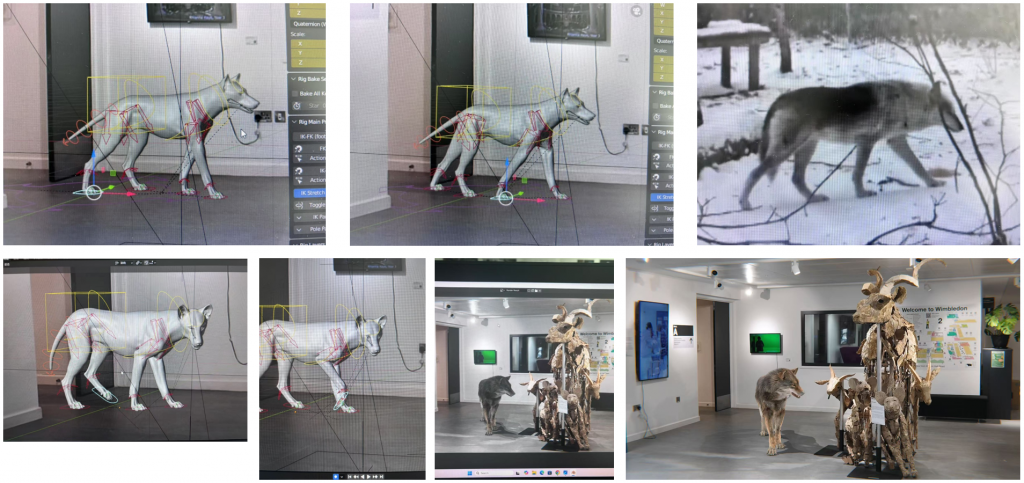
Motion tracking
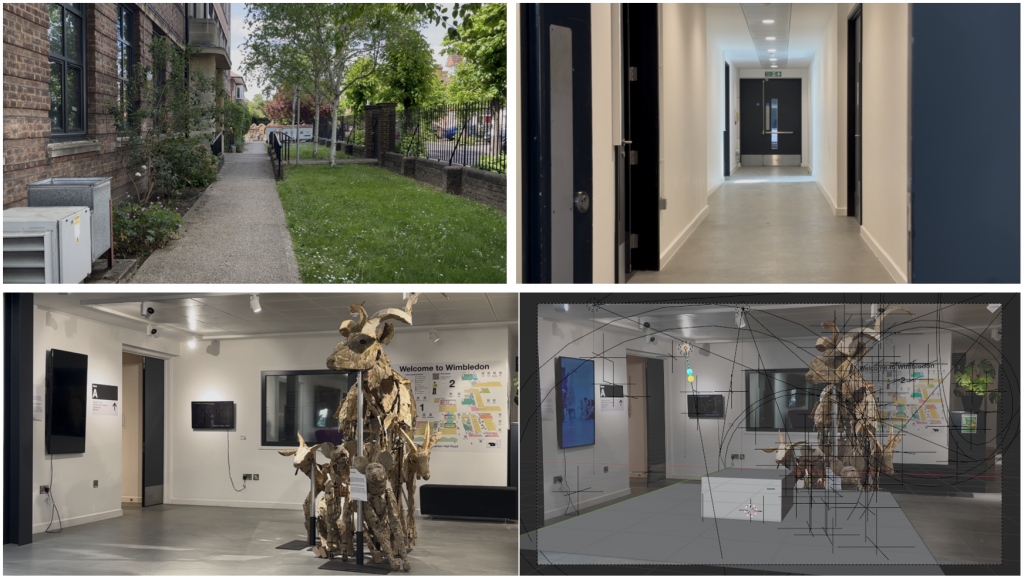
On campus, I selected these three scenes as the material options for the subsequent animation. After discussing with Molly and Paul, I finally decided on the last scene video with animal installation art. Some anchor points in the video are tracked through the motion tracking function on bledner. Then, the movement trajectory of the camera is inferred from the movement path of the anchor points, and the movement of the camera in blender and the camera in the video is synchronized.
Animation
My idea is to have the Wolf interact with the device in the scene, and logically express it from the Wolf’s perspective and personality from beginning to end. Since I really don’t know how to replicate the walking posture of a Wolf, even though I found the video materials, I still consulted Molly.
First, let the Wolf learn to move horizontally. Move the right hand and left foot first, then move the trunk, and repeat this action with the other two hands and feet. Then lift the hands and feet to a certain height during the movement, bend them and then lower them. Finally, when lowering, appropriately bend the wrists and ankles to increase the sense of weight when walking, and the torso should also naturally shake up and down along with the steps…
As it is rather complex and difficult to express, I won’t elaborate further here. At the end, I also added the action of the Wolf making eye contact with the audience to enhance the authenticity of the Wolf in the scene. Finally, the animation part has come to a perfect end!
2D – future animal character design
Since the 3D part took up a lot of my time, I’m very sorry that I only devoted less time to the 2D part. But I eventually designed what the Wolf would look like in five million years, but I haven’t had time to color it yet. The story is set in a world after a nuclear war. The creatures on Earth have moved underground to survive, so their forms have changed.
So for wolves, the mutation due to environmental changes:
1. vision degraded, ears enlarged to enhance perception.
2. body grows crystal structures for radiation absorption and
defence.
3. limbs are strong, posture tends to be semi-upright to adapt to the narrow underground space.

What can I do better?
Overall, this unit is a brand-new challenge. Although it was all about new knowledge and very painful to do, the result was indeed quite unexpected. However, I hope that in the future I can allocate my time reasonably, draw more and understand the structure of animals more, not just focus on the surface but think rationally about why they move this way and how bones drive the body?